Project structure
One-page project
The overall structure of a project is defined by the project script, which specifies the different tables and pages of the project, as well as the links between them.
To create both a table and its corresponding page, use the app.form() function as follows:
app.form ( "page_key", "Page title" )
This call is enough to define a simple project with a single page, and it may very well be enough for your project:
app.form("project", "My Project")
Multiple pages
To define a project with several pages in Goupile, you need to nest pages inside a main category:
app.form ( "category_key", "Title of category", () => {
app.form ( "page1", "Title of page 1" )
app.form ( "page2", "Title of page 2" )
// Other pages...
} )
With this simple structure, the project will be organised as shown in the screenshot below:
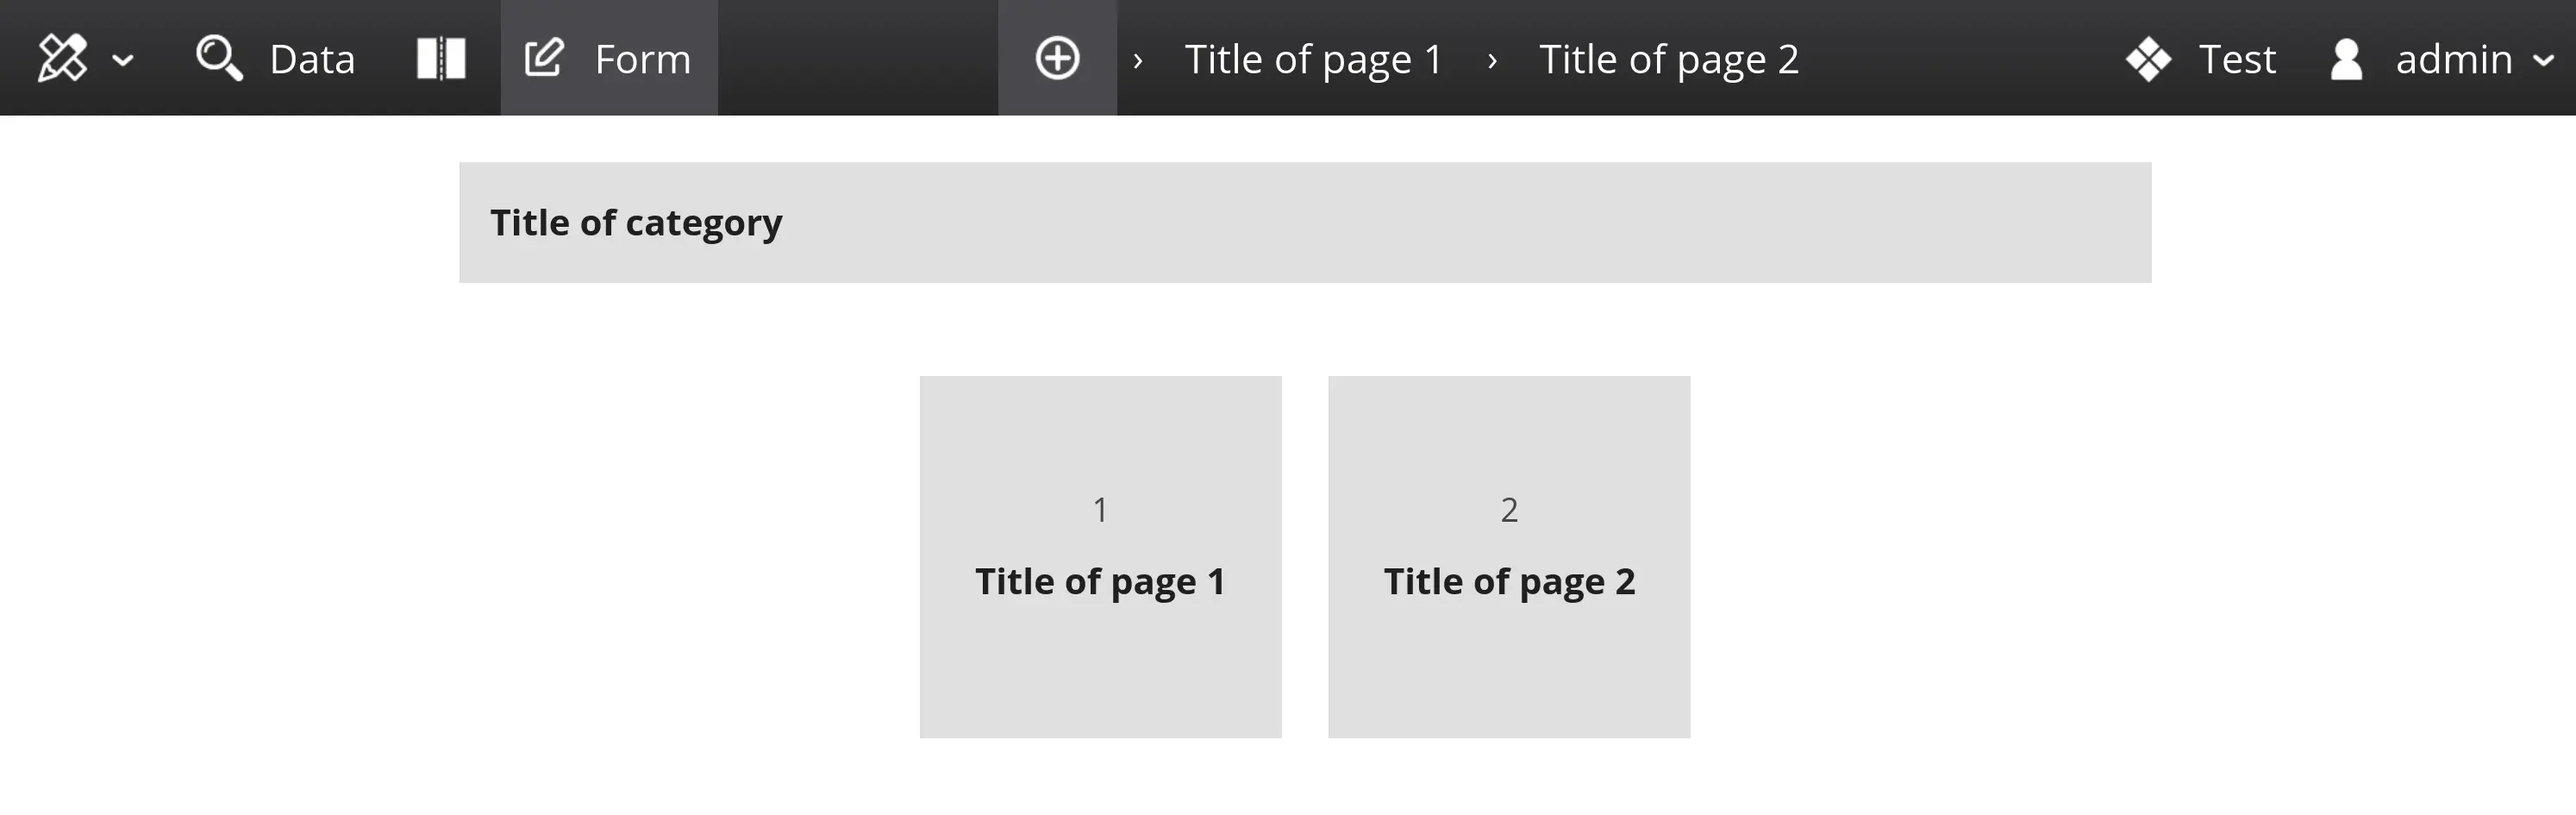
Each form page has its own data table, and these tables are linked by a TID identifier, which is a unique random identifier.
During export, data from the two pages will be exported into two separate tables (or two Excel sheets), which can be joined with the help of the __TID column.
Hierarchical menu
The nesting of pages also defines the project's menu hierarchy. This is demonstrated in the following example, which is closer to a real-world project (with an inclusion page, and two follow-up forms), where the menu clearly separates each stage:
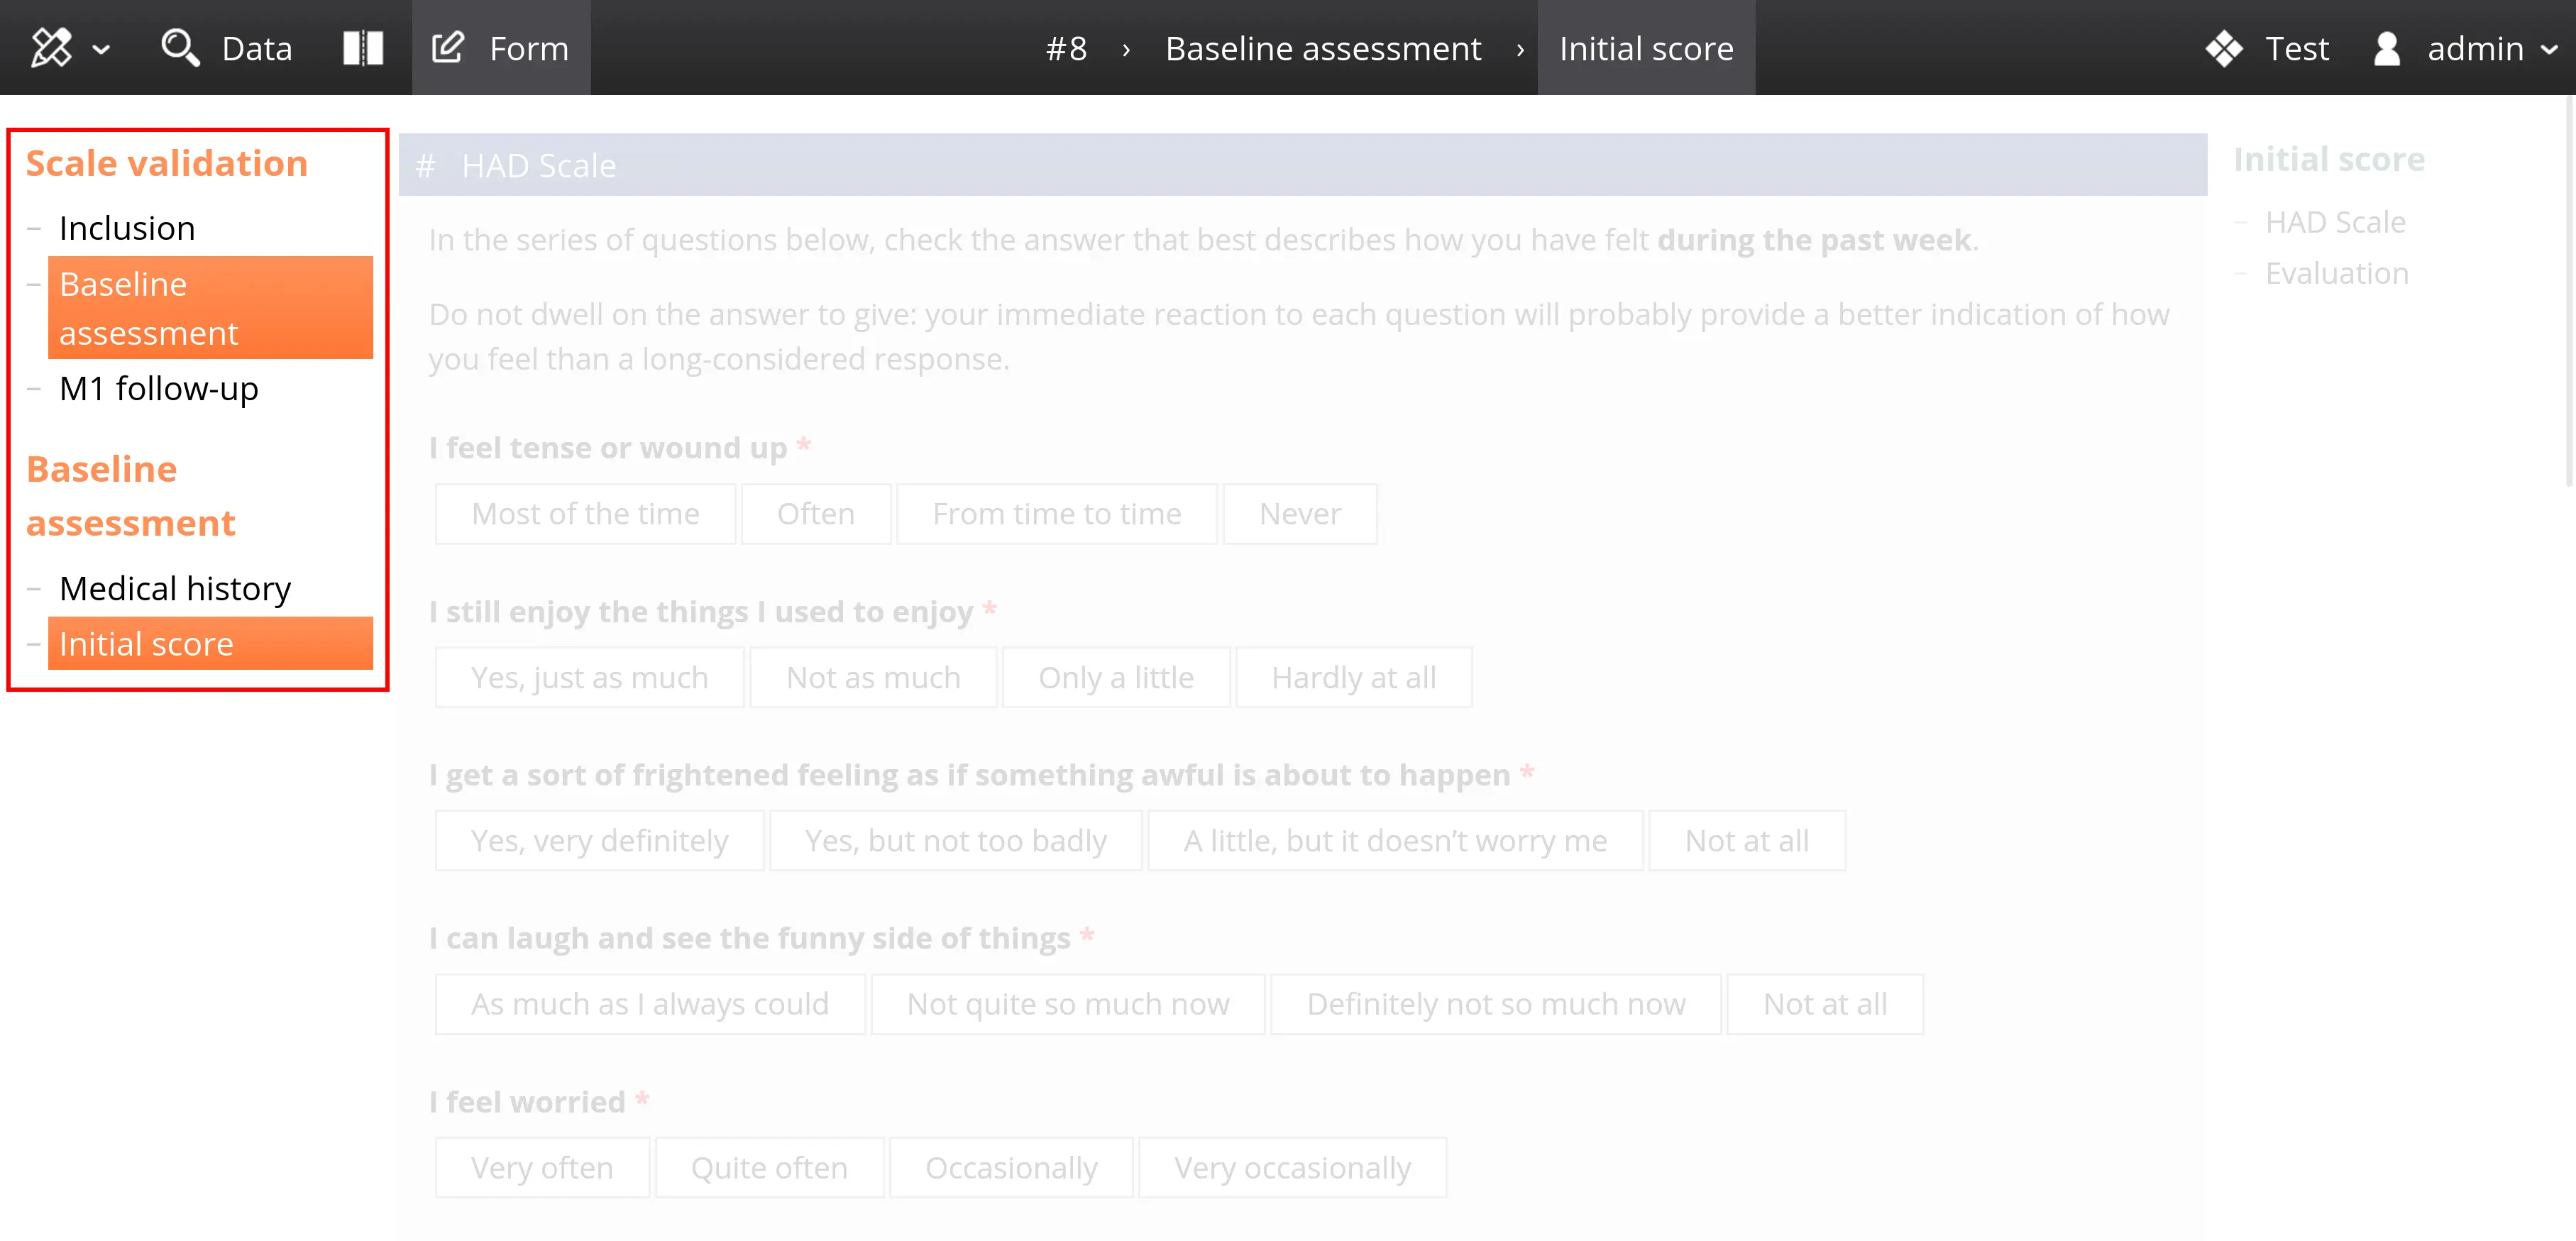
The project code corresponding to the form structure shown in the screenshot is provided below:
app.form("project", "Scale validation", () => {
    app.form("inclusion", "Inclusion")

    app.form("initial", "Baseline assessment", () => {
        app.form("history", "Medical history")
        app.form("score0", "Initial score")
    })

    app.form("m1", "M1 follow-up", () => {
        app.form("follow1", "1-month follow-up")
        app.form("score1", "Intermediate score")
    })
})
Page options
Annotation system
Goupile offers a variable annotation system, each variable can be accompanied by a completion status and a free comment. See the documentation on annotated variables for more details.
This feature is not enabled by default for historical reasons. You must enable it using the app.annotate option as follows:
app.annotate = true

// app.form("project", "Title")
// ...
All variables can be annotated by default, but you may adjust this option for each variable if necessary.
Conditional pages
It is often necessary to enable or disable certain pages based on various conditions, such as the data entered in a specific page, or various completion conditions.
A classic example is the inclusion page: the inclusion page must be the only available page until the participant's inclusion criteria are met. If the criteria are not met, the remaining pages remain disabled.
Use the enabled option to disable pages. This is a dynamic option, meaning it can be computed based on the record data.
app.form("project", "Validation", {
    app.form("inclusion", "Patient inclusion")

    // The baseline assessment will only be available if variable "ok" equals 1
    app.form("baseline", "Baseline assessment", { enabled: thread => thread.data.inclusion.ok == 1 })
})
Refer to the documentation on using data from other pages to handle the thread object used above.
It allows access to data from completed pages, to identifiers (TID, sequence, counters, non-blind randomisation), and other metadata.
Here is a more complete example, with an inclusion page and two follow-up pages, which are only activated after checking the inclusion criteria (age and data-sharing agreement):
// Project script

app.form("project", "Validation", () => {
    app.form("inclusion", "Patient inclusion")

    app.pushOptions({ enabled: thread => thread.data.inclusion.ok == 1 })

    app.form("baseline", "Baseline assessment")
    app.form("follow1", "1-month follow-up")
})
// Content of the "inclusion" page

form.section("Inclusion criteria", () => {
    form.binary("adult", "Are you 18 years old?")
    form.binary("agreement", "Do you agree to participate in this study?")

    values.ok = (values.adult == 1 && values.agreement == 1) ? 1 : 0
})
Not all options can be used dynamically. In version 3.12, the enabled and sequence options are dynamic options.
Successive pages
By default, each page operates independently and must be opened from the menu or from the record status page. When the user saves a page, it remains open.
You can define a sequence of pages using the sequence option, which can be used in three ways:
sequence: true: saving the page opens the next page that also has a sequence optionsequence: "next_page": saving the page redirects explicitly to the named pagesequence: ["page1", "page2", "page3"]: saving a page sends the user to the next page in the list
Once the end of the sequence is reached, the user is redirected to the status page.
The sequence only works when eacgh page is first saved.
When the user reopens an already saved page to modify it, the Continue button takes them directly to the status page.
Additionally, sequences are completely ignored in dual-panel mode (with the list of records on the left and the form on the right). In that case, the current page remains open after saving.
Simple sequence
The following example demonstrates the use of a simple sequence with two pages, after which the user is redirected to the status page.
app.form("project", "2 pages", {
    app.pushOptions({ sequence: true })

    app.form("page1", "First page")
    app.form("page2", "Second page")
})
This example uses app.pushOptions() to define the sequence option for multiple pages without repeating it each time.
Multiple sequences
The following example demonstrates the use of two sequences. When the user opens page "A", they must complete pages "A", "C" and "E" in succession. If they open page "B", they must complete pages "B", "D" and "F".
let ace = ['a', 'c', 'e']
let bdf = ['b', 'd', 'f']

app.form("project", "6 pages", {
    form.text('a', 'A', { sequence: ace }) // Next page: C
    form.text('b', 'B', { sequence: bdf }) // Next page: D

    form.text('c', 'C', { sequence: ace }) // Next page: E
    form.text('d', 'D', { sequence: bdf }) // Next page: F

    form.text('e', 'E', { sequence: ace }) // Back to the status page
    form.text('f', 'F', { sequence: bdf }) // Back to the status page
})
Dynamic sequence
The sequence option is dynamic, meaning it can be computed based on the record data. This allows you, for example, to change the order of forms based on data entered or randomization (for example).
The example below changes the order in which the test1 and test2 pages are displayed based on a randomized counter:
// Project script

app.form("project", "Validation", () => {
    app.pushOptions({ sequence: sequence })

    app.form("general", "General data")
    app.form("test1", "Test 1")
    app.form("test2", "Test 2")
})

function sequence(thread) {
    if (thread.counters.random == 2) {
        return ["inclusion", "test2", "test1"]
    } else {
        return ["inclusion", "test1", "test2"]
    }
}
// Content of the "general" page

form.section("Base information", () => {
    form.number("age", "How old are you?")
    form.binary("metropole", "Do you live in France?")

    // Randomization counter for page order
    meta.randomize("random", 2)
})
Not all options can be used dynamically. In version 3.12, the enabled and sequence options are dynamic options.
Autosave
By default, data is saved only when the Save button is clicked. Saving requires a fully valid form, with missing items and errors either corrected or annotated.
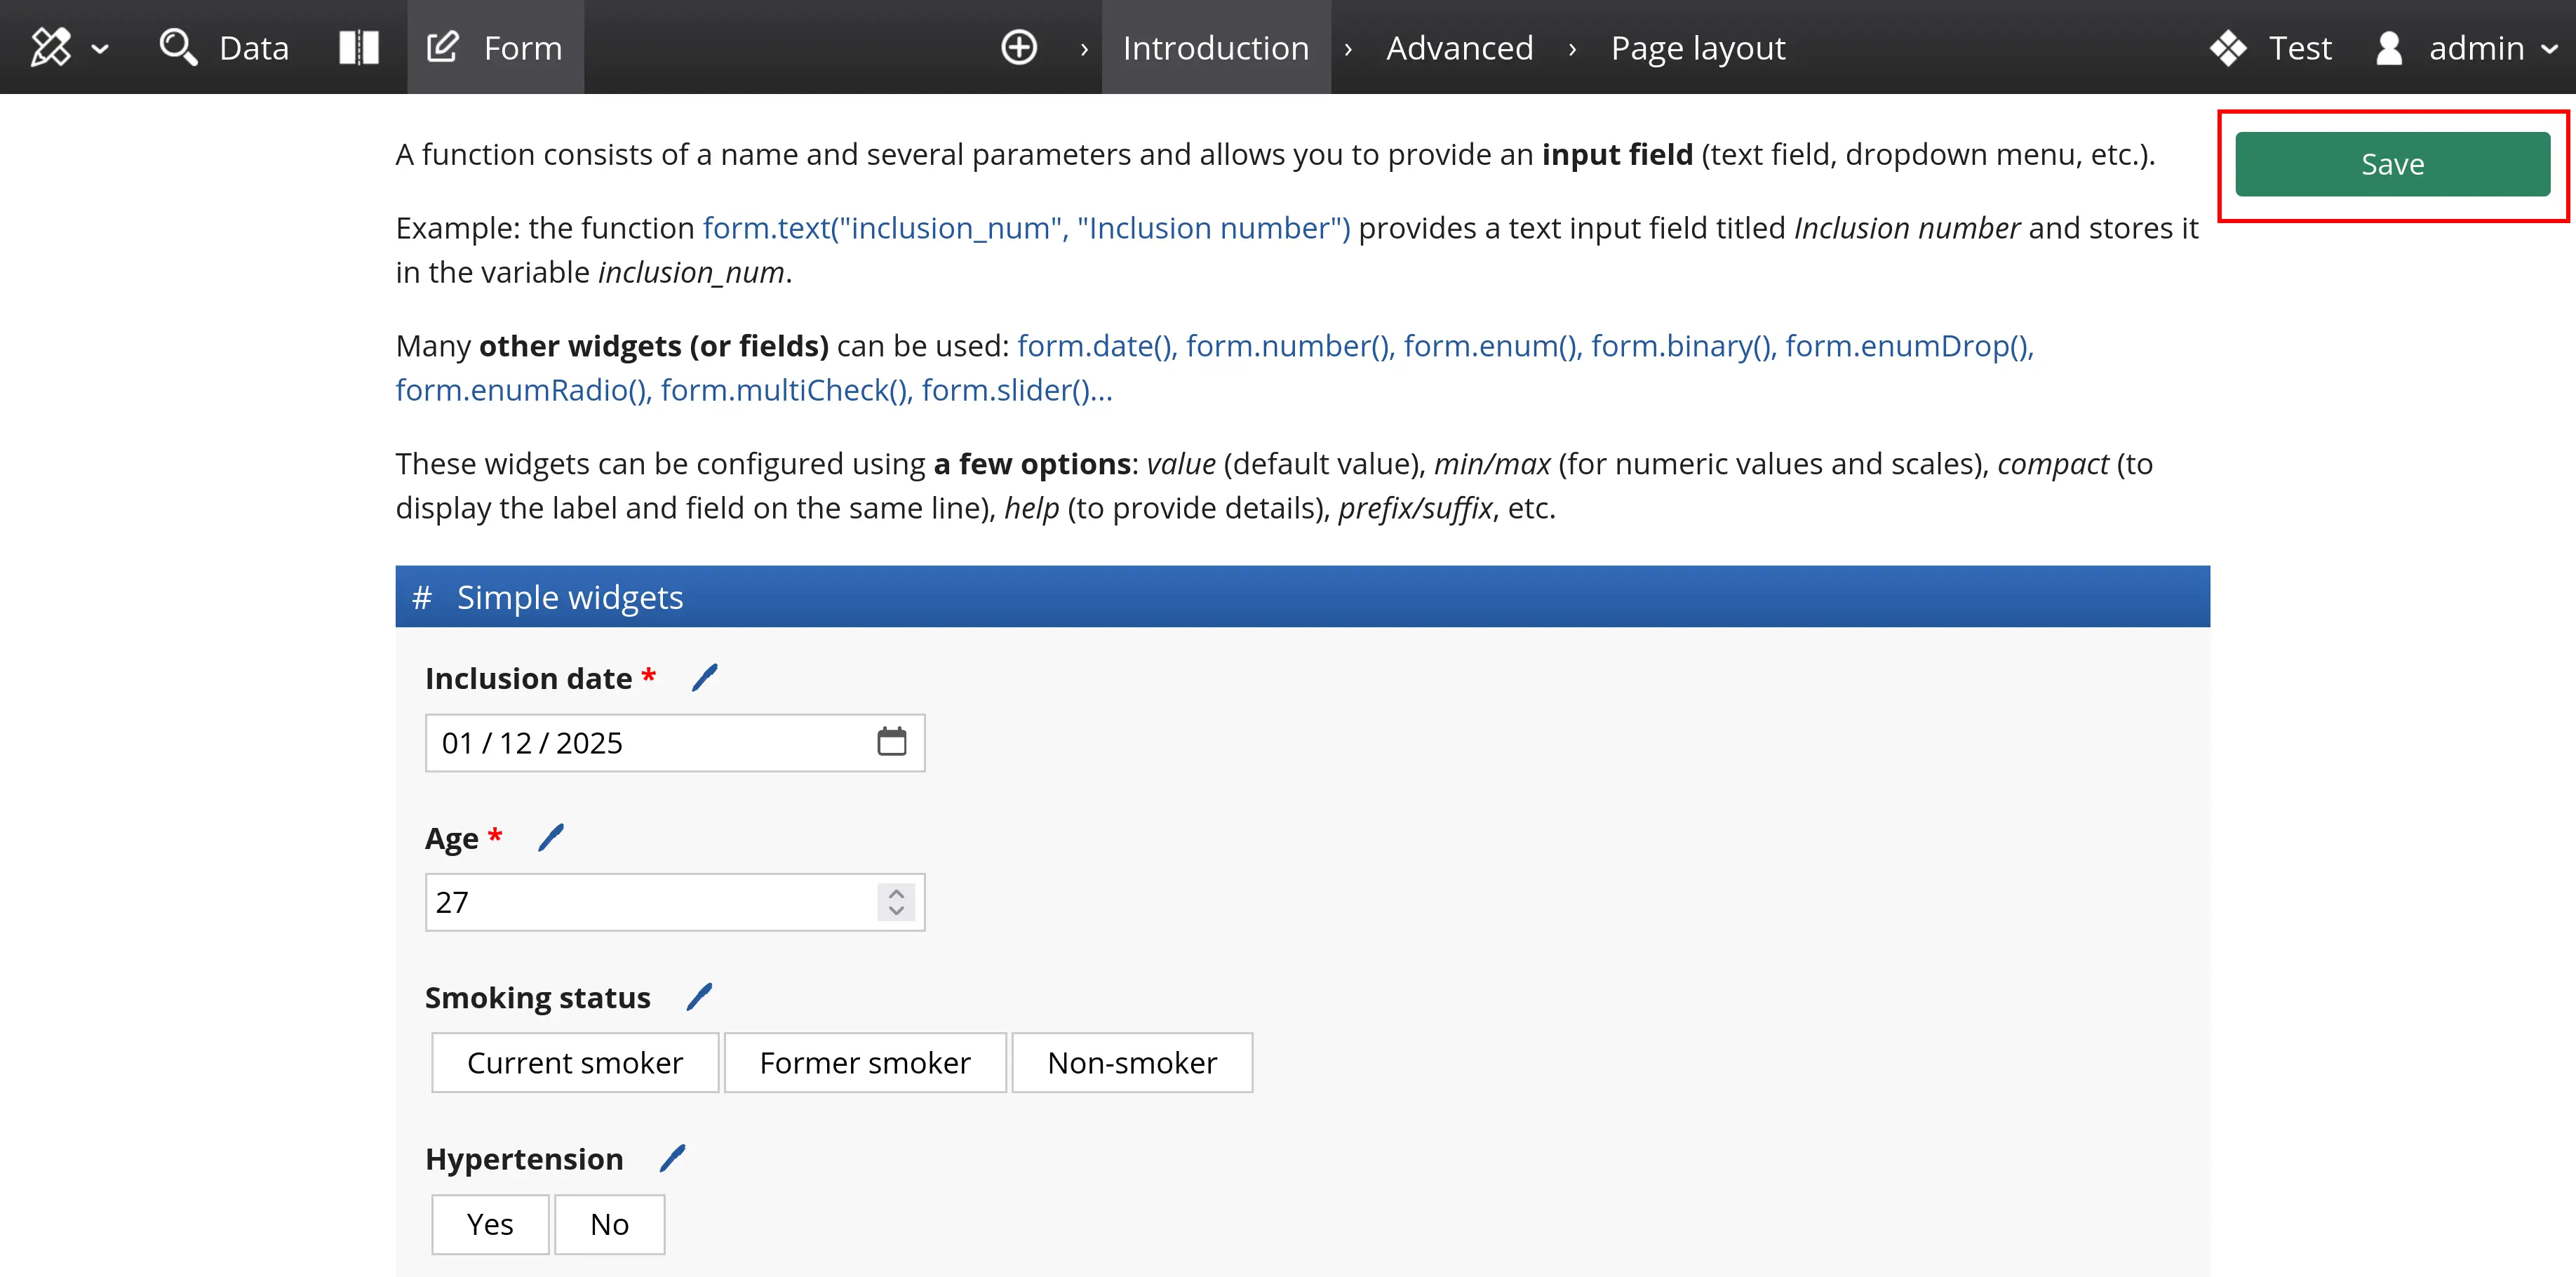
You can switch to an autosave mode. In this mode, changes are saved at regular intervals, without blocking errors. Use the autosave parameter and specify the save delay in milliseconds.
// Changes are saved after 5 seconds of inactivity (5000 ms)
app.form("auto", "Automatic save", { autosave: 5000 })
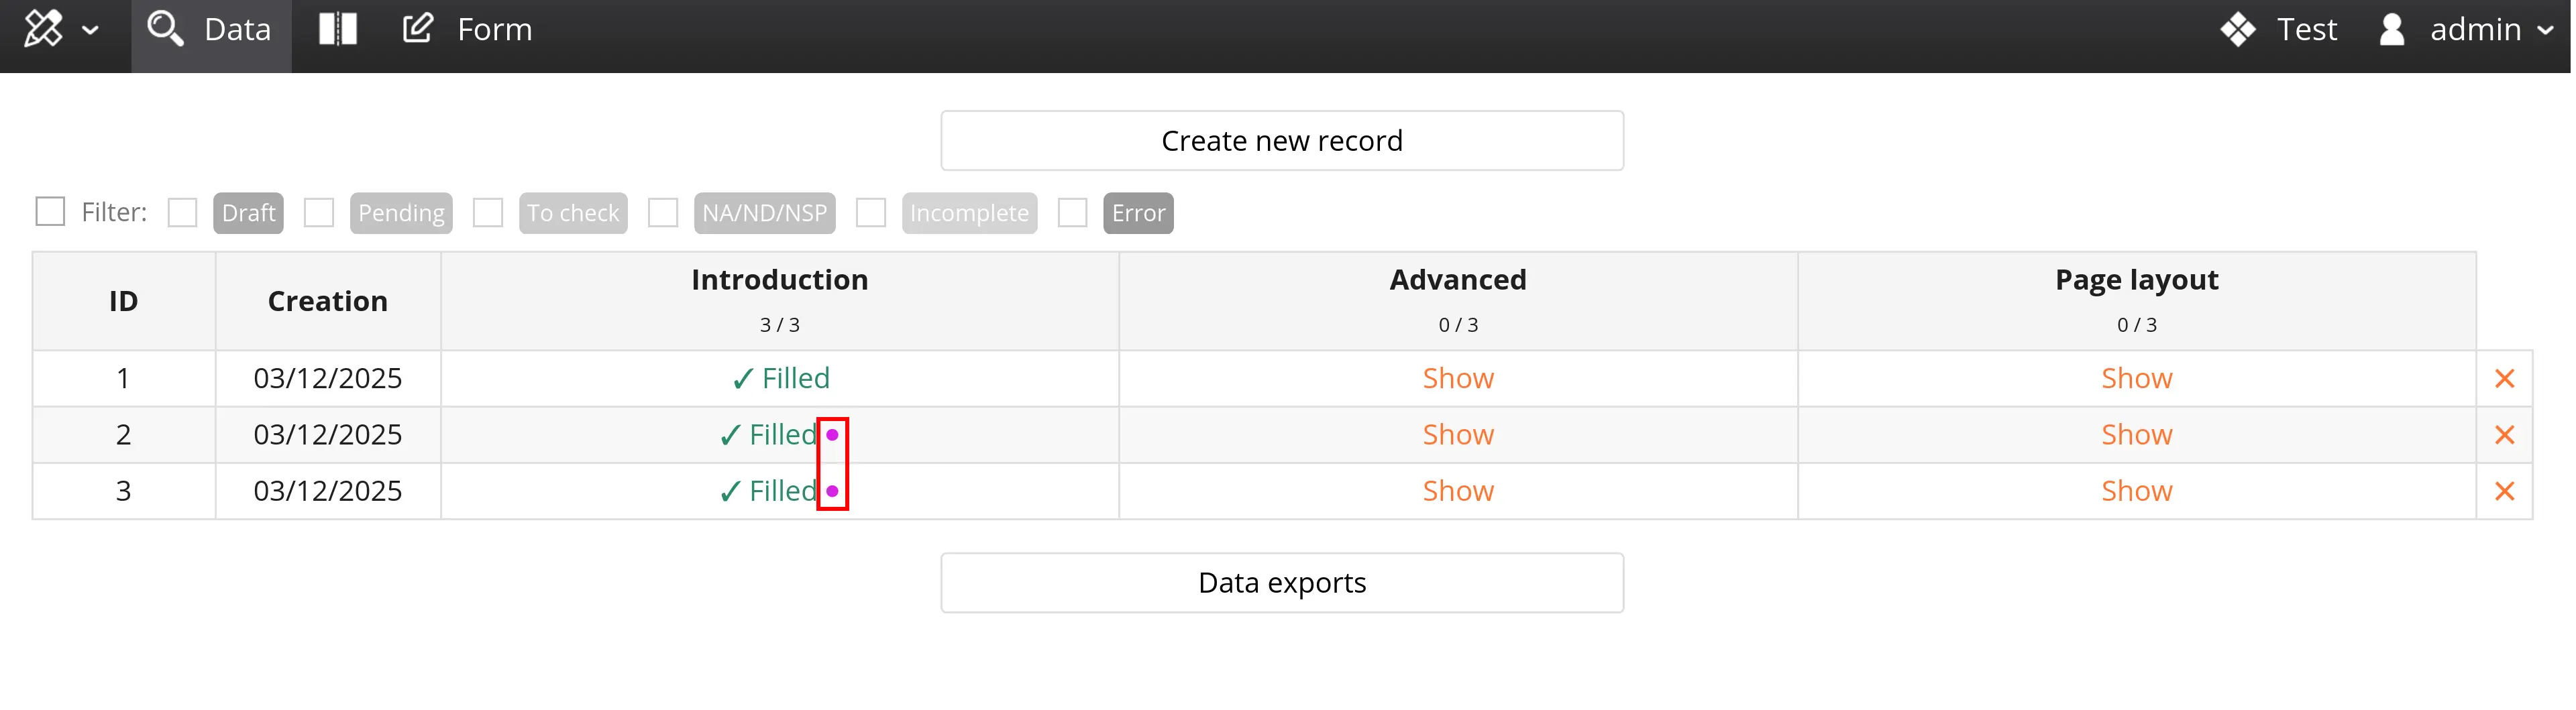
Pages saved automatically are marked with a draft status, which is visible and filterable in the data entry table. The save button remains available even in autosave mode; it validates the data and removes the draft status.
Locking and forgetting
By default, Goupile records can be modified at any time. User permissions distinguish between reading, saving and deleting records, without differentiating between creating and modifying a record.
Goupile offers two features to prevent modification of an existing record; they may be used separately or together:
- Locking (
lock) to make the data read-only - Forgetting (
forget) for guest users (or users with save rights but without read rights)
Locking
The lock option locks the data entered by the user, with three possibilities:
lock: true: immediate locking at the time of savinglock: delay: delayed locking after the specified number of milliseconds (for examplelock: 300 * 1000to lock after 300 seconds, i.e. 5 minutes)lock: false: manual locking using a dedicated button
Note the distinction between the default value lock: null (no locking feature) and the value lock: false (manual locking).
In the second case, saving does not lock the record, but a "Lock" button appears in the interface and can be used manually.
As with other options, this may differ for each page of the project. In a multi-page form, you can define the lock option (immediate or delayed) on the last page to lock the record once it is fully completed, but not before.
app.form("project", "2 pages", () => {
    app.form("info", "Participant information")
    app.form("feedback", "Feedback on the scientific day", { lock: 300000 })
})
You can also define it on the first page, with a delay, if you want to impose a limited filling time.
Users with audit rights (DataAudit) can unlock a record using the dedicated button.
Forgetting
This feature concerns two types of users:
- Guests (for projects that are open to guests)
- Users with save permission (DataSave) but without read permission
When these users create a record in Goupile, they obtain reading and editing rights limited to the records they have created. In Goupile, they are said to have a claim on that record.
This claim can be removed by setting the forget: true option in the page options. As with locking, this option can be used on the last page of a multi-page record: the user can fill in multiple pages until the final page, on which the claim is removed.
app.form("project", "2 pages", () => {
    app.form("info", "Participant information")
    app.form("feedback", "Feedback on the scientific day", { forget: true })
})
Users with reading rights (DataRead) can see all records in the project. Claim removal (forgetting) has no effect for these users!
Use locking instead in this case.