Initial setup
Once the Goupile server is deployed, you can perform the initial configuration by opening the application's URL in a browser (for example http://localhost:8889) and clicking on the administration link.
A Goupile domain corresponds to the entire set of Goupile projects and users. When you install a domain, you must first access the installation screen in order to configure Goupile, create the first root user, and retrieve the archive key:

The initial settings include:
- The domain name, which must contain only lowercase letters and no spaces. By convention, it is convenient to make it match the actual domain name (for example
beta.goupile.fr), but this is not required. - The domain title, which is displayed in the administration panel and in some contexts outside of projects (such as the TOTP label for users who enable two-factor authentication).
You must also create the first user, who will have root (or super-administrator) status and will be able to log in to the administration panel after installation.
Finally, make sure to securely store the archive key (for example, in your password manager). This key will be required to restore Goupile archives if you use this feature. If it is lost, it cannot be recovered, and existing archives will not be restorable.
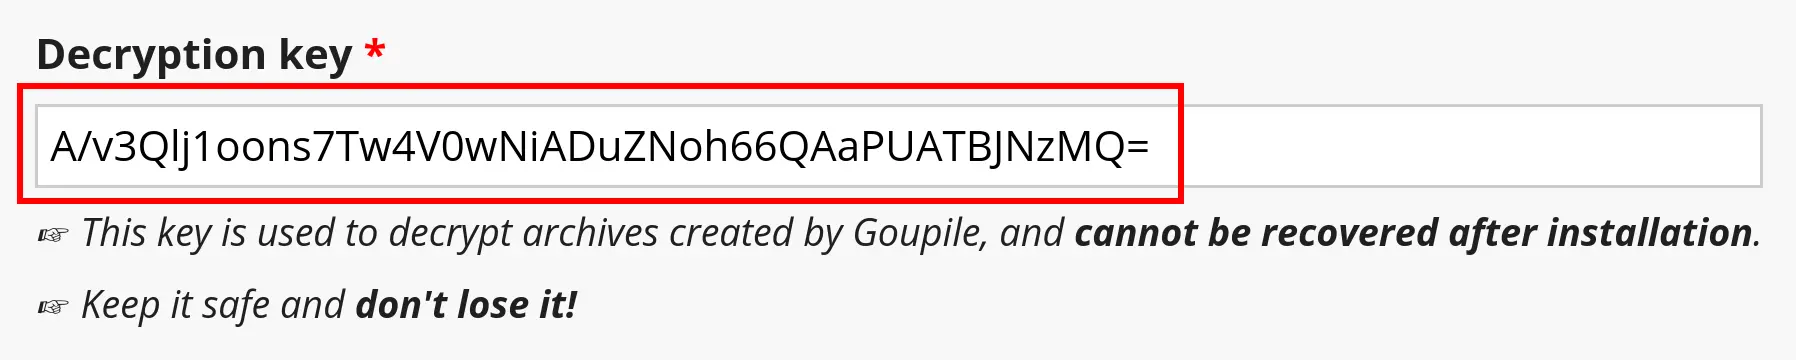
However, if you lose it, a new (different) key can be set, and archives created after the change can be restored using the new key.
Additional configuration
Once Goupile is installed, additional options become available.
Open the global configuration panel by clicking on the "Configure domain" link shown in the screenshot below:

Some of the following settings can be configured in the goupile.ini file. When this is the case, the values from the file take priority and cannot be changed through the administration module.
SMTP
Some features require sending emails (for example, the custom registration system). You must configure an SMTP server to enable Goupile to send emails.

Security
The security tab allows you to define the password policy, distinguishing between three user classes:
- Normal users
- Administrator users have administrative rights on at least one project
- Root users (or super-administrators) have all rights on the Goupile domain

For each user class, you can enforce a password complexity level among three choices:
- Low complexity requires passwords with at least 10 characters
- Moderate complexity requires passwords containing letters, numbers, and symbols, or passwords longer than 16 characters
- High complexity uses a scoring and penalty system based on the characters used
This complexity is enforced when a user changes their password, or after each successful login for administrators and super-administrators.
However, administrators can create users whose passwords do not follow these constraints.